Note: This is a blog post that I put together in 2015. I happened to have the HTML file of it saved somewhere so I thought this would be a good place to start with a blog.
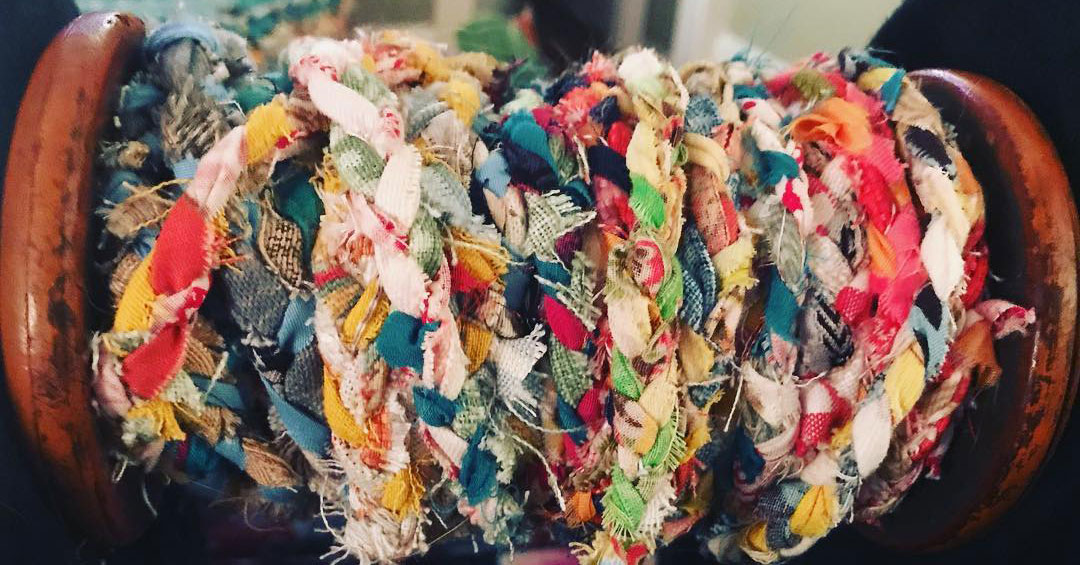
Scrap fabric tends to accumulate around me. I can never give it up. There’s something so precious to me about small, uniquely cut pieces of things. So I knew I’d be into making scrap fabric twine once I started really getting into fabric-related crafts. I always loved the way it looked on everything. There are a few methods out there, and after trying a couple different ways, I found the best route for me and my particular sloppy/impatient style.
On Pinterest I see a lot of twine made from two strands. This didn’t work for me. I got too caught up in twisting the individual pieces and holding on tight, and the finished product would always just unwind out of control. So I started using three pieces and a traditional braid. It totally works.
A couple key things to making the best three stranded scrap twine possible:
- Use fabrics that vary in thickness. I have lots of scarf-like pieces mixed in with several thick, cloth-like ones. If you use three pieces of an old tablecloth or something, the twine turns out really thick and never what I had in mind in the first place. Usually I can get away with using one thick piece with two thin ones and get the desired result. The important thing is to try and keep the total thickness of the three pieces relatively even as you go.
- Use scrap pieces that vary in length. It helps with the continuity of the twine. If you start with three pieces of the same length, you’re going to have to connect three more in the exact same spot, and every point of connection is going to be thicker than the rest of the twine.
- Add scrap pieces as you go. It is so annoying and difficult to deal with really long pieces of anything. If you’re into macrame or anything involving yarn, you know that very long pieces can sometimes be a huge pain in the ass to keep from getting tangled while you’re working with them. The good thing about scrap fabric twine is that you just kind of add onto it as you go.
1. Prep your scrap fabric pieces.
Cut a bunch of long thin strips if they’re not already in that form.
Go ahead and cut holes in each end.
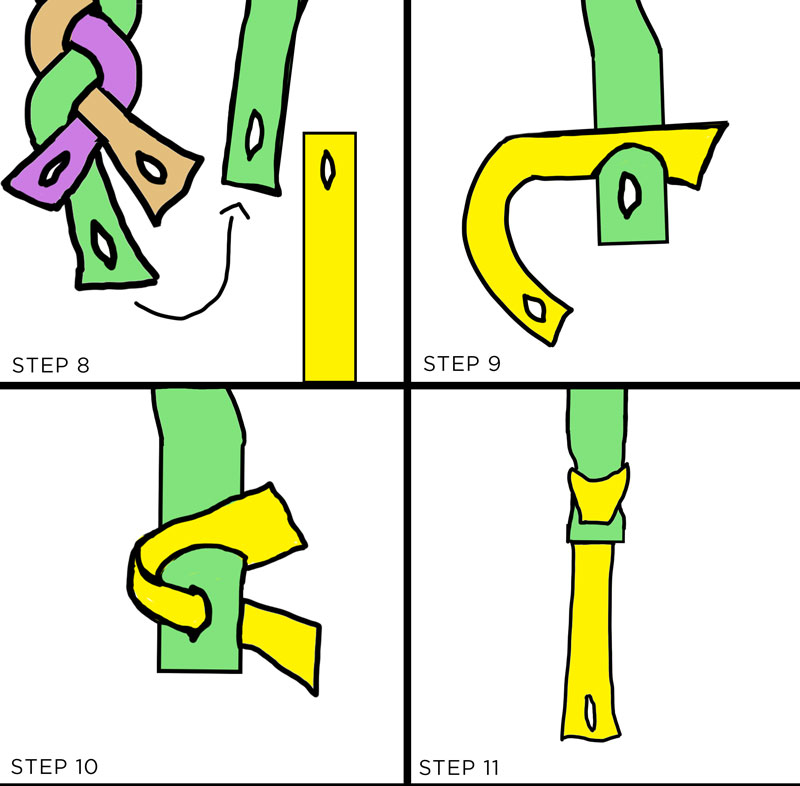
2. Start your braid by securing three pieces together.
You have three pieces: scraps 1, 2, and 3. All of differing lengths.
Slide scraps 1 and 2 into one of the holes on the end of scrap 3.
Slide the other end of scrap 3 through the holes in scraps 1 and 2.
Scrap 3 is going to want to pull the other way, but tighten it and just pull back down. Once you get going it won’t matter.

Note: You don’t have to start this way; you can just as well tie a knot in three pieces. I just find that I like the way this starts much better, instead of just a scraggly knot.
3. Braid tightly.
When I start a new piece I generally attach the beginning to something sturdy so I can pull it tight to get the braid started. A lot of times I just end up holding it between my knees, but a clipboard also works. Once you get some slack you can wrap it around a spool. I got a hold of some giant vintage spools that are perfect for this, but odds are you probably have something around the house that will get the job done.
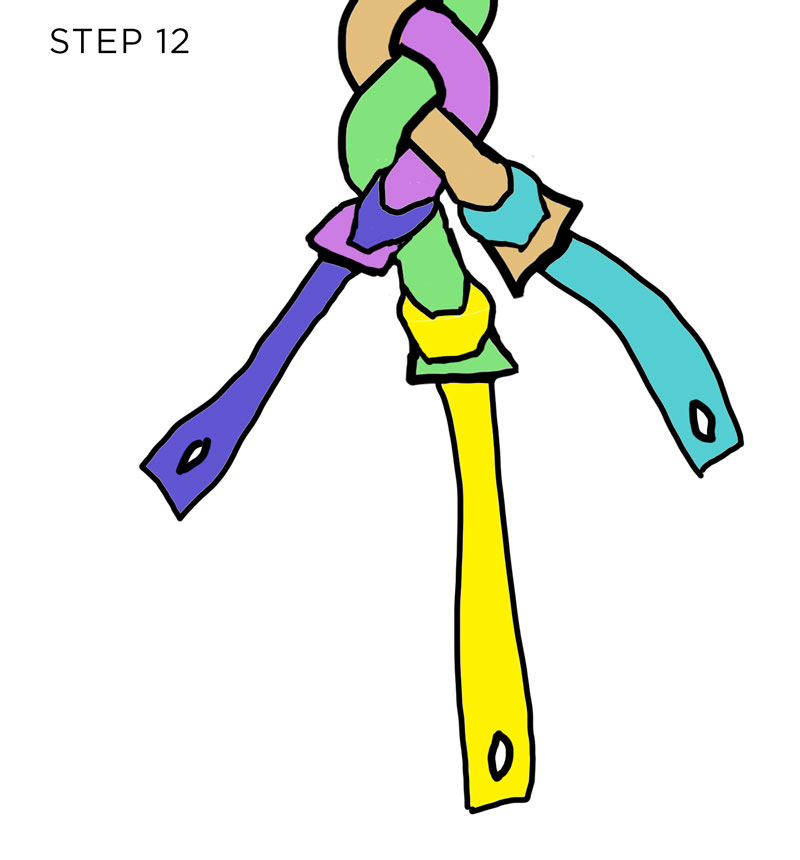
4. Add pieces as you go.
Assuming you’ve prepped all your pieces beforehand, you should have a hole at the end of each strand. Using the same method we used to begin the twine, wrap a new piece around your loose end and pull it tightly.
Keep adding as you go. In this crude illustration I haven’t used pieces varying in very much length, but it works out best if you don’t attach all new pieces in the same spot.