
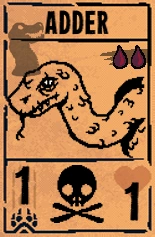
Reptile
Adder
1 • 1
 Touch of Death
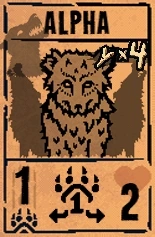
Canine
Alpha
1 • 2
 Leader
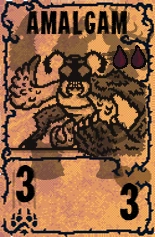
Misc
Amalgam
3 • 3

Misc
Amoeba
1 • 2
 Amorphous
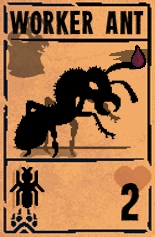
Insect
Worker Ant
Ants • 2
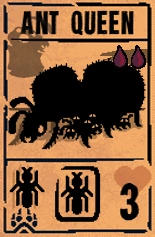
Insect
Ant Queen
Ants • 3
 Ant Spawner
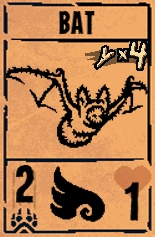
Misc
Bat
2 • 1
 Airborne
Misc
Beaver
1 • 4
 Dam Builder
Insect
Bee
1 • 1
Airborne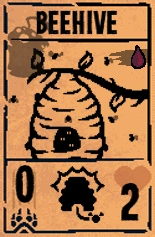
Insect
Beehive
2
 Bees Within
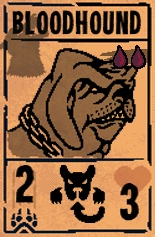
Canine
Bloodhound
2 • 3
 Guardian
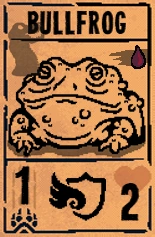
Reptile
Bullfrog
1 • 2
 Mighty Leap
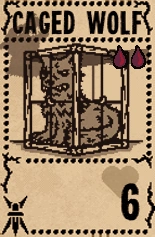
Canine
Caged Wolf
6
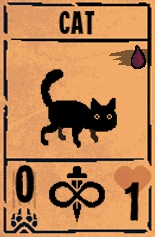
Misc
Cat
1
 Many Lives
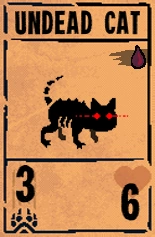
Misc
Undead Cat
3 • 6
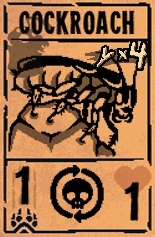
Insect
Cockroach
1 • 1
 Unkillable
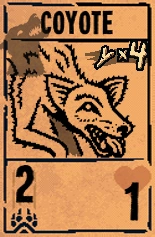
Canine
Coyote
2 • 1

Misc
The Daus
2 • 2
 Bellist
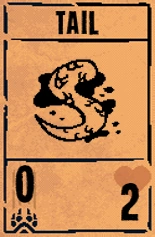
Misc
Tail
2

Hooved
Elk
2 • 4
 Sprinter
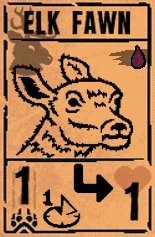
Hooved
Elk Fawn
1 • 1
Sprinter Fledgling
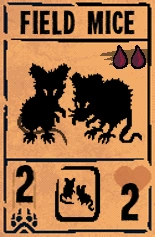
Misc
Field Mice
2 • 2
 Fecundity
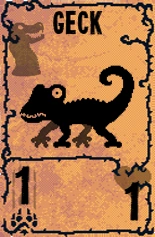
Reptile
Geck
1 • 1
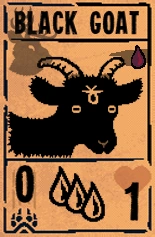
Hooved
Black Goat
1
 Worthy Sacrifice
Misc
Grizzly
4 • 6

Hooved
Child 13
1
Many Lives
Avian
Kingfisher
1 • 1
Airborne Waterborne
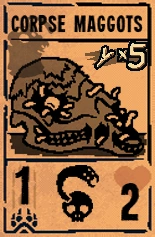
Insect
Corpse Maggots
1 • 2
 Corpse Eater
Avian
Magpie
1 • 1
Airborne Hoarder
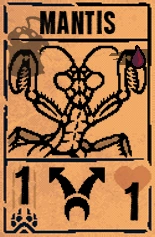
Insect
Mantis
1 • 1
 Bifurcated Strike
Insect
Mantis God
1 • 1
 Trifurcated Strike
Misc
Mole
4
 Burrower
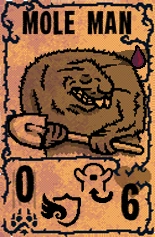
Misc
Mole Man
6
Burrower Mighty Leap
Hooved
Moose Buck
3 • 7
 Hefty
Hefty
Insect
Strange Larva
3
 Fledgling
Insect
Strange Pupa
3
Fledgling
Insect
Mothman
7 • 3
Airborne
Hooved
Pack Mule
5
Sprinter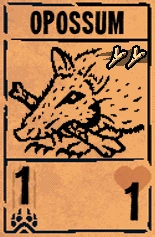
Misc
Opossum
1 • 1

Misc
River Otter
1 • 1
 Waterborne
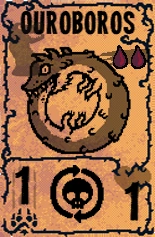
Reptile
Ouroboros
1 • 1
Unkillable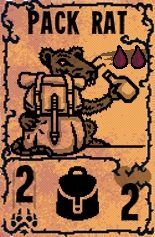
Misc
Pack Rat
2 • 2
 Trinket Bearer
Misc
Porcupine
1 • 2
 Sharp Quills
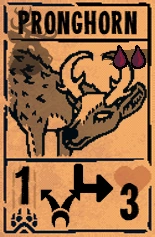
Hooved
Pronghorn
1 • 3
Sprinter Bifurcated Strike
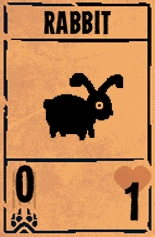
Misc
Rabbit
1

Misc
Rat King
2 • 1
 Bone King
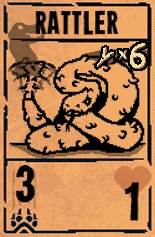
Reptile
Rattler
3 • 1

Avian
Raven
2 • 3
Airborne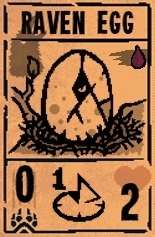
Avian
Raven Egg
2
Fledgling
Misc
Great White
4 • 2
Waterborne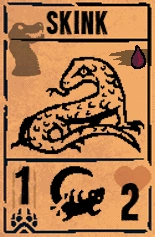
Reptile
Skink
1 • 2
 Loose Tail
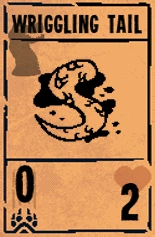
Reptile
Wriggling Tail
2

Misc
Skunk
3
 Stinky
Reptile
River Snapper
1 • 6
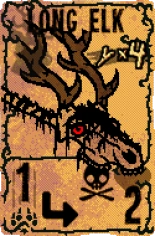
Hooved
Long Elk
1 • 2
Sprinter Touch of Death
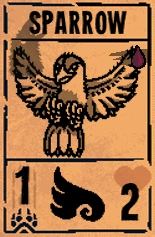
Avian
Sparrow
1 • 2
Airborne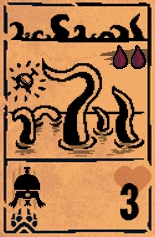
Misc
Bell Tentacle
Bell Ringer • 3
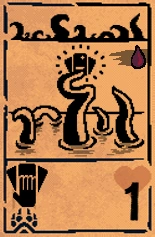
Misc
Card Tentacle
Card Counter • 1

Misc
Mirror Tentacle
M!rror r0rriM • 3
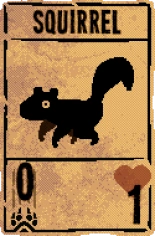
Squirrel
Squirrel
1
Misc
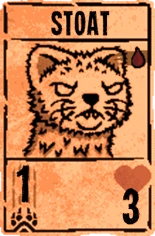
Stoat
1 • 3
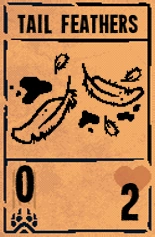
Misc
Tail Feathers
2
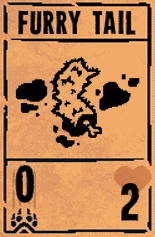
Misc
Furry Tail
2

Misc
Wriggling Leg
2
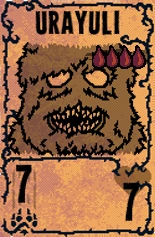
Misc
Urayuli
7 • 7
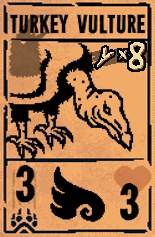
Avian
Turkey Vulture
3 • 3
Airborne
Misc
Warren
2
 Rabbit Hole
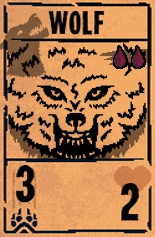
Canine
Wolf
3 • 2
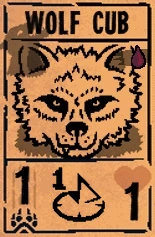
Canine
Wolf Cub
1 • 1
Fledgling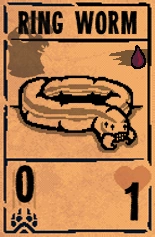
Insect
Ring Worm
1

Misc
Glitched Card
General Tips
Keep your deck tight. You will always draw a card you can play turn 1, if you only have 1 card in your deck that is 0-1 blood, you’ll always draw it.
It is better to have multiple cards that can deal 5+ damage to the board (either in a single shot or e.g. 3 damage bifurcated) than one super powerful card.
Take crappy cards (like one blood cards) to the campfire and risk them multiple times. Either you get a great card or a weak card gets trashed out of your deck.
Sigils that are on generator cards (beehive, warren, etc) will apply to the cards they spawn. There are some really powerful combos there.
Don't buy multiple pelts of the same type, because you only get one pool to select from. So three hare pelts will choose from the same 8, whereas one of each pelt type will choose from three independent draw pools.
You don't necessarily need to do damage to block attacks. Sometimes playing a squirrel or pelt to chump block is better.
The trapper's first phase is the hardest of the two that he has. It is helpful to have extra pelts for his second phase.
Avoid getting too many cards. Keep a relatively small deck, 8 - 12 cards, making use of sigil stones to reduce your numbers any time you start filling up.
Third boss (the trapper) is tricky. Save your good cards and try to use something with undying for the bear traps. You can also place a squirrel in front of a trap, and have a mantis or pronghorn set it off, trading the squirrel for a wolf pelt.
Try to avoid the trapper whenever possible because he'll force you to take at least 1 rabbit pelt. It's okay for delaying an attack, but for the most part it's just another useless card that you can't sacrifice.
Generally speaking, the best items are those that either directly tip the scales or get rid of a crucial card on the other side of the board (pliers or scissors).
Map Legend
 receive an item; if you have 3 already, receive a pack rat card
 spend your gold teeth on pelts which can be used at a trader
 pick a cost and receive a random card with that cost
 pick a card from your deck and upgrade its health or attach
 pick one of 3 trials; if you succeed, receive a powerful card
 merge two identical cards into one with the combined stats of both
 pick a card from your deck and clone it; copies may be imperfect
 trade pelts for cards; rare pelts provide better cards
 break one of 3 boulders; receive whatever you find inside
 pick a card from a random selection of 3
 sacrifice a card to inscribe its sigils onto another
 a regular combat; if your scales are tipped, you lose one life
 boss fight; only one life to sacrifice
 boss fight; only one life to sacrifice
 boss fight; only one life to sacrifice
 receive a totem piece from a random selection of 3
 similar to a regular combat, except the opponent has a totem effect
 pick an animal type and receive a random card of that type
 remove a card from your deck; increase amount of starting bones